
Kimchi Pizza with Bulgogi Crust

5am. Awake for hours after listening to guided meditation and podcasts with snooze-inducing voices, it seemed that my insomnia had returned. Instead of waiting for sleep, I decided to start the day early. I walked to the kitchen and made pizza with a Korean spin. I further challenged myself by creating a dough out of quinoa. Success and failure are no matter. The mission: to experiment and learn a thing or two in the process.
There are 4 layers to this recipe: the dough, the crust, the sauce and the toppings. I initially wanted to prepare the bulgogi (for the inner crust) from scratch, but when I encountered a packet of pre-marinated bulgogi at the Korean market, I caved in. Partly due to curiosity of how their version would taste. Partly because it would save me time and money.
INGREDIENTS

For the quinoa dough:
• 4 cups quinoa (any colors)
• 1 cup water

For the tomato sauce:
• 1 beefsteak tomato
• 5 cloves garlic
• 2 teaspoons balsamic vinegar
• 1 teaspoon olive oil

For the toppings:
• 2 cups cheese (I’m using Daiya, a dairy-free version)
• 1 green pepper
• 3 mushrooms
• big handful of kimchi
• sliced black olives
INSTRUCTIONS
Step 1
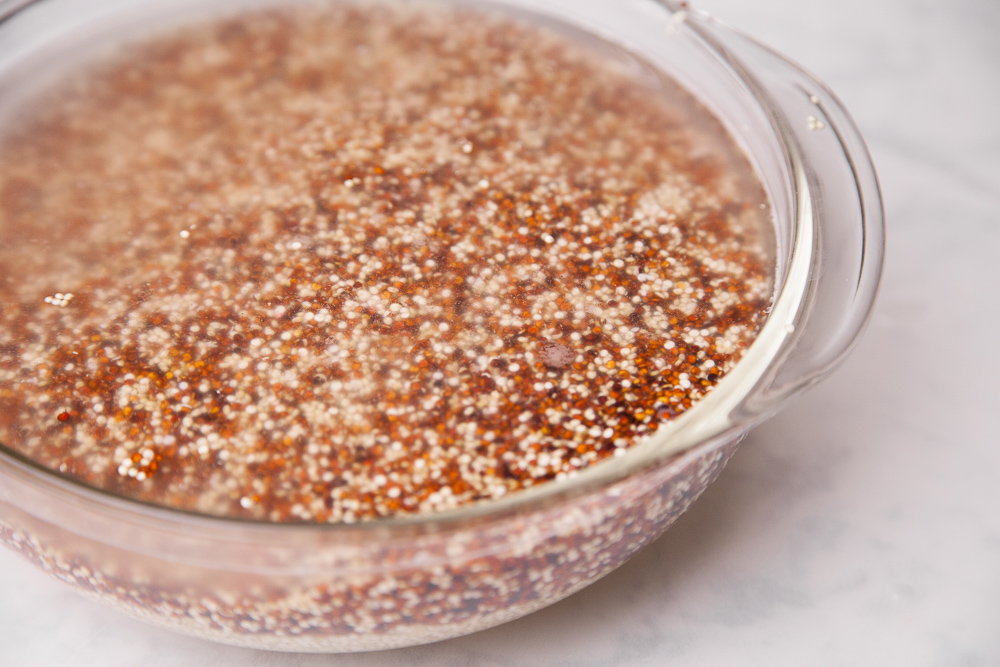
Wash the quinoa to remove potential bitterness.
Let the quinoa soak for 8 hours. I let mine sleep in the fridge overnight.
Trivia: The exterior of quinoa is made of saponin, which prevent birds from eating it.

Step 2
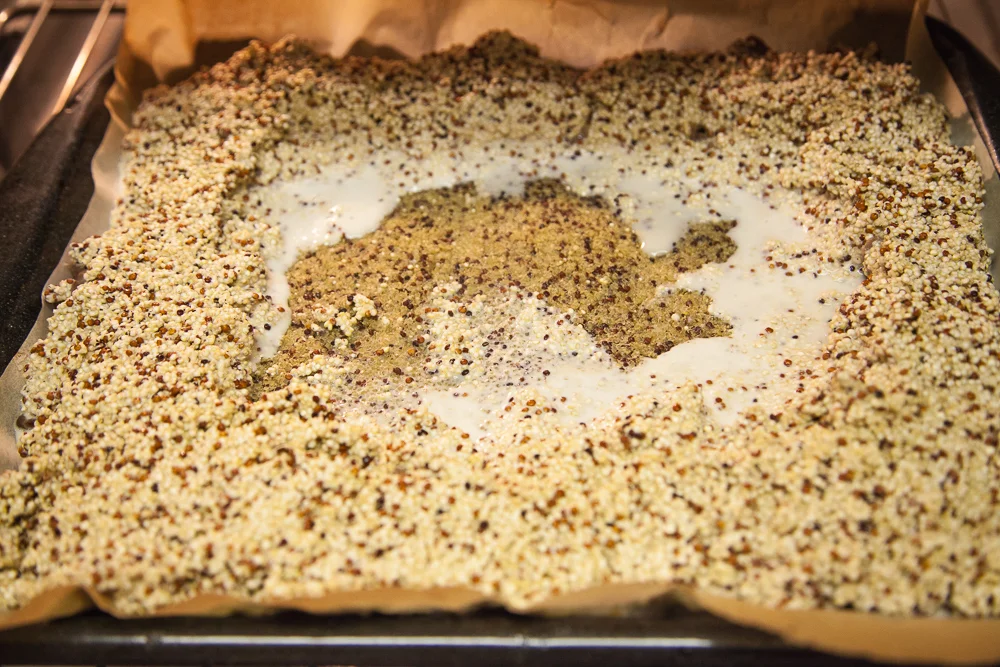
Preheat your oven to 450 degrees. Drain the water from the quinoa bowl. Place the quinoa, 1/2 cup of water and a pinch of salt into the blender or food processor. Blend.
Grab your pan. Cover with parchment paper. Place quinoa dough evenly on top.

Step 3
As the quinoa dough bakes, cook the bulgogi.
I got this marinated beef from H Mart. You can also prepare it at home.

Keep in mind the meat will go in oven for additional cooking.

Step 4
Once the quinoa dough is baked for 15 minutes, line the bulgogi about one centimeter away from the outer edge of quinoa dough.
Step 5
Place rest of uncooked quinoa dough on the bulgogi. Put pan back into oven for 15 minutes.

Step 6
Spread tomato sauce between the 4 walls of bulgogi crust. However due to my deliriousness (from lack of sleep), I missed this step and advanced with the cheese.
Step 7
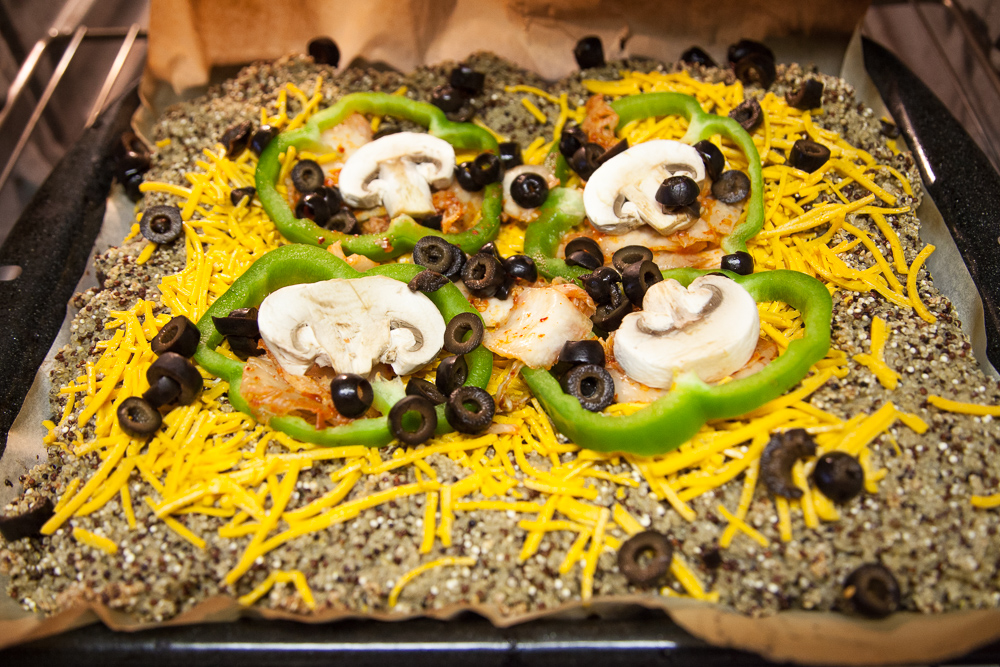
Add toppings of your choice. In the following order, I placed on kimchi, slices of pepper, mushroom and olives. Put back into oven for a final 10 minutes.

Your edible creation is complete. Pull it out of the oven, give it the supermodel treatment by taking photos, and enjoy!
Watch me eat this Kimchi Pizza with Bulgogi Crust in my mukbang video! I give an honest review:

Lessons learned from this experimental cooking:
use a blender that works well to create a smoother quinoa dough
sleep well and remember to pour on the tomato sauce
cut bulgogi into smaller pieces to create a dense crust
dump on more cheese!